
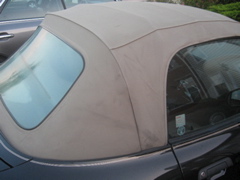
Before - Top lasted 10 years - all worn and dirty
Soft Top Replacement Before: Bill Blanchard (1997 2.8) writes: The
top lasted 10 years, about 3-5 years longer than normal. |
Before - Crease marks in top and rear window
Bill's Roof- Before
Bill writes: Worn and dirty... ( The dirt pattern
matches LiZZZ's) |
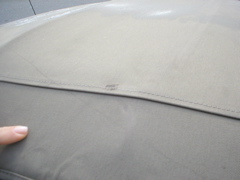
Before - Worn from internal cage elbow
Bill's wear marks Bill writes: ...with crease marks and areas where
the interior cage was wearing through the fabric. |
P1010012 copy
LiZZZ's
wear marks match Bill's |
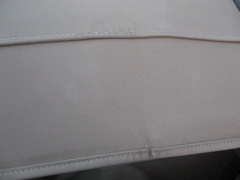
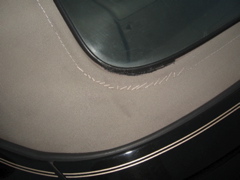
Before - Stiching coming loose and worn marks
Before- Bill's stitching coming loose in a different way than LiZZZ
|
Before - My very lame attempt to stitch and silicone
Before: Bill's Rear Window Stitching/Leak Bill writes: Around the
rear window you can see my poor attempts to stitch and silicone
seal the area, but I still experienced leaks around the affected
area. LEAKS! Augh.
|
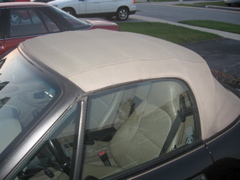
Before - Top lasted 10 years - all worn and dirty copy
Before: Bill's roof
Bill, even the protective black tape surrounding
your windshield survived! That's got to be one of the last few Z3s
that still has it! Under that tape is more of your original paint-
like the day it left the factory! |
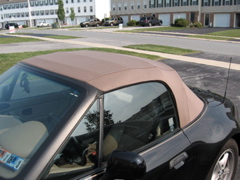
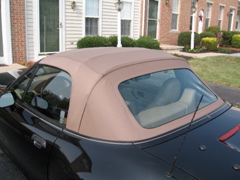
After - A whole new look
After: Bill's New Roof
Bill writes: I had Auto Upholstery of York County do the work. Total
cost (parts, labor and tax) $1320.76. After market top--OEM was
just too expensive for me. The top was made from Haartz? He said
the quality of the top is the same for all convertibles.
Our tops are made by Haartz for BMW.
And they installed the roof without even marring the silly black
tape!!! |
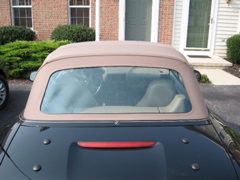
After - I can finally see out the back
After: Bill's new top- and rear window Bill writes: The rear window
in the aftermarket roof does not zip out, it is permanently stitched
in. This top passed the rain test, we had torrential downpours here
and no leaking. This top will last me until I decide on a new car.
(Unless you decide to keep it since it's nice
and dry inside now!) |

After - Interior cage
After: Bill's New Roof Bill writes: As far as care, they suggested
I rinse it off occassionally and wash it with a soft brush and RagTopp
cleaner every couple months, only apply RagTopp impregnator sparingly.
|
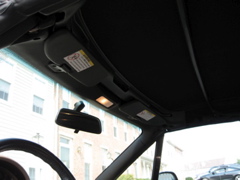
After - Interior front
After: Bill's New Roof Bill writes: They said you do not want to
over spray the top with the impregnator as it will develop a film
and cause the material to deteriorate more quickly. This is contrary
to what I believed, but I guess he is the subject expert. I believed
the more you sprayed the more protected you were--go
figure. |
After - New top and rear window
After: Bill's new roof Bill writes: My new top has enough repellant
to last six months before I need to
spray it. |
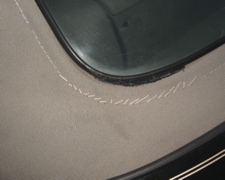
Before - My very lame attempt to stitch and silicon copy
Before: Bill's leaky back window. A brave attempt
at stitching Bill. Also note that if you are going to use silicone
glue to patch a rear window leak, use CLEAR SILICONE GLUE NOT BLACK.
As you can see here, black seems like a good idea, but in practice
it doesn't look good. |

After - No more leaks in the corner
The fabric looks a little different in the
aftermarket version and the rear window looks much BIGGER! I wonder
if Bill has less of a blind spot? |
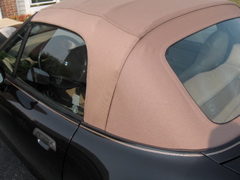
After - Rear driver side
After Bill writes: The car really looks new again and that....makes
me very happy :-)
That's all that counts Bill!
Bill writes: Take care friends - Bill Blanchard |
 Esmerelda's Pages ~ Z3ers.com