Z3 Hardtop Installation Notes
Harry Albright
I did not take pictures along the way, but here are a few tips for the initial
installation of a hardtop on a Z3. There are some things that the BMW
instructions do not say that would be very helpful to know before you
start. Like: Several parts come with the hardtop that the instructions do
not address. There are no instructions for adjustments during the initial
installation – a critical omission that, if corrected, can save much
time and frustration.
I will not repeat things that are in the installation instructions from the
BMW CD.
Ordering the Parts
One local dealer tried to tell me that I had to order the installation kit
(about $300) in addition to the hard top kit. This is not correct. The hard
top comes with all of the parts needed to do the compete installation, with
the exception of the switch for the rear window defroster -- I had to buy
that as an extra (about $30). The hard top comes with a switch, but it is
not the right one for my car. I have a 98. My guess is that the installation
kit that dealer (not where I bought the top) was trying to sell me is what
you would need if you picked up a used hard top and wanted to install it on
your car.
Bringing it Home
I ordered my hard top from a dealer with the intention of installing it myself.
I had seen the instructions and the job looked simple enough, particularly
if your car has the electro hydraulic soft top, which mine does. The top was
not in stock anywhere in the States, so it had to come from Germany. Two months
later, I got a call from the dealer that it had arrived. The hard top is shipped
in a very large crate with a wooden frame and cardboard sides. It’s
a nice, well-protected package, but you will not be able to take your top
home in your Z3. Nor can you “sit it on” your Z3 without doing
the initial installation steps. So, be prepared to truck your top home for
installation. I took mine out of the crate at the dealer’s and put it
in the protective cover/carrying case that comes with it. Then, I put it carefully
into the back of my Expedition and hauled it home. The top is not too heavy,
but you’ll find it much easier and safer to move it if you have a helper.
Parts List
The parts list in the installation instructions that the dealer should print
out and give to you does not include several trim parts that go on the top
itself. The parts shown in the instructions are those that go into the car
to prepare it to receive the hard top. The trim parts really give the top
a finished appearance from the inside of the car. There are no exposed latches
or screws when the job is done. The top itself is nicely lined and finished
in black velour type material. These plastic trim parts, which cover up the
latches and screws can be installed after the rest of the job is done.
There will be a little plastic cover for each front corner of the hard top
to cover the adjustment screws. These just clip on.
There will be a half-cup to cover the rear latching mechanism on each side.
These attach to the inside of the hard top itself. There are two screws for
each of these and the screws go in from the bottom.
There are two mounting bolts for each support for the hard top. – a
& b in the parts list picture.
Each of the coverings for the hard top supports (one behind each seat –
c & d on the parts list picture) has one mounting screw that goes in from
the top. These are installed after the top has been installed and adjusted,
but you will have to remove the top to install them.
Installation
The installation instructions include narrative descriptions of the process
and pictures. Unfortunately, the pictures are not in-line with the narrative,
so you’ll find yourself flipping back and forth a bit. In the narrative,
the associated picture is identified with something that looks like a part
number, e.g. F 39 54 008 ZS. This number can be found in the bottom right
corner of each illustration. To simplify the reference, I took a few minutes
before starting to add the illustration number that appears in bold print
in the top left corner of each illustration, 1,2, etc., to the narrative instructions.
Throughout my notes, I will refer to the illustrations by the sequential number
found in the top left corner rather than by the part number in the bottom
right corner. These notes parallel the printed instructions from BMW.
Preparing the car
I never dismantled my driver’s seat as recommended in the instructions.
Again, because my car has the electro hydraulic soft top, this was not necessary.
It would likely be a worthwhile, if not necessary, step for cars with the
manual soft top.
Illustration 2 Removing the covers underneath the holding fixture for the
tonneau cover was not as simple as it sounds in the instructions. The instructions
say to press together and remove. Mine were foam-filled and covered with a
light black plastic covering. Since they are no longer necessary, I tore mine
out in pieces and threw them away.
Illustration 3 Loosening the nuts of the main pivot bracket for the soft top
is to make room for the hard top supports, which will slip underneath these
nuts. It is not necessary to remove them. Just loosen them enough to get the
support brackets underneath them. If you do remove them, be careful not to
drop them down inside the car.
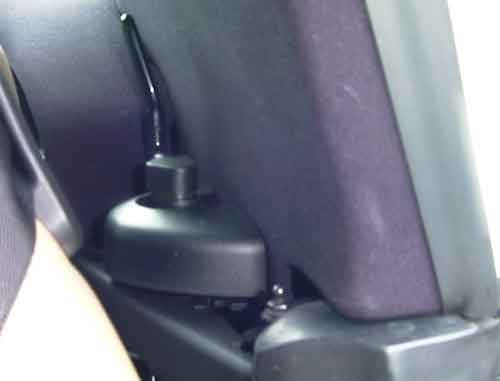
Illustrations 4, 5, 6 Removing the oddments tray and installing the rear window
defroster switch – It is necessary to loosen the console to raise it
up enough to install the mounting cover for the switch and the switch itself.
This required removing the screws on each side of the rear of the console
as in illustration 6, but I did not find them on the top as in the illustration,
only on the sides. It was also necessary to remove the tray from the center
console to get at the retaining screw that is underneath it. Removing the
tray required popping out the little rubber cover in the center of the little
tray behind the emergency brake to get at the bolt that it covers, and loosening
the emergency brake boot to get access to the nut that goes on the bottom
of the bolt. After removing this one bolt, the tray lifts off easily, exposing
the console retaining screw underneath it.
On cars with the electro hydraulic soft top (how about if I just call this
a power soft top), the wiring harness for the rear window defroster switch
is taped to the underside of the console just in front of the oddments tray.
You will need to be able to get your fingers underneath the console to be
able to press the switch cover into the retaining bezel that goes on the underside.
Pull or cut the tape away from the wiring harness. Insert the wiring harness
through the back bezel and the center hole of the switch cover. Then plug
the switch into the wiring harness and put that all back together. You may
want to wait to push the switch back into the switch cover plate until after
you have mounted the hard top and tested to ensure that the rear defroster
actually works.
Illustrations 7, 8, 9, 10, 11 If your car has a power top, you can ignore
these illustrations and the associated instructions. They do not apply. These
are the steps necessary to retrieve and route the wiring harness for the rear
window defroster switch to the console. It’s already there if you have
a power top.
Illustration 12 Driver’s side support bracket. In my car, it was as
simple as unplugging the connector. The corresponding adapters and connectors
in the hard top simply plugged into what was already there. I did not need
to install any adapters.
Illustrations 13 & 14 Simply plug in the connectors and slide the support
bracket under the nut of the main pivot bracket that you loosened in illustration
3. There are two bolts that mount the hard top support bracket to the car.
Insert those bolts and tighten them. Be careful not to drop them down inside
the car or you’ll have a little extra work to do to retrieve them. Tighten
the nut of the main pivot bracket. There are two bolts that hold the socket
for the pins in the hard top to the support bracket. There is room for some
front to back adjustment of the socket. Leave these bolts a little loose for
now so that you can adjust the position of the hard top when you first set
it on the car.
Illustration 15 This is the mounting instruction for the hard top support
bracket on the passenger side of the car. It is similar to the driver’s
side, but simpler because there are no electrical connections to worry about
here.
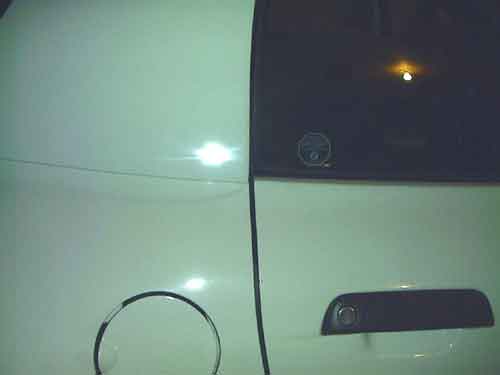
Fitting the Hard Top
It’s now time to set the top on your car for the first time. Before
you do this, loosen (do not remove) the three torx screws at each front corner
of the inside of the hard top. These screws hold the front mounting pins to
the hard top. Loosening them now will allow you to position the hard top on
the car for a proper fit and seal.
Have a partner help you set the hard top on the car. The pins on the bottom
back of the hard top will fit into the sockets on the support brackets. These
brackets are also loose so that you can slide the top front to back to get
a good fit. When the top is sitting on the car, slide it until the top lines
up with the body at each door. The mounting pins on the front of the top should
fit down into the holes in the brackets on the windshield frame. When you
have the top lined up in this way, note the position of the sockets on the
rear hard top support brackets. You will need to tighten them in this position
after removing the top.
Now carefully lift the top off of the car and place it on something soft to
protect it. Tighten the hard top sockets in position on the support brackets.
On my car, they were about as far forward as they would go.
Illustration 17 Plug these wires into the hard top mounting socket. These
allow the rear window defroster to work when the hard top is installed.
Put the hard top back on the car, latch it in place, and check the alignment
again. If it’s OK, insert the torx bolts up through the windshield frame
to secure the top in place and tighten with the tool provided. Now tighten
the three torx screws on each front corner of the hard top. Take it for a
little ride and check for wind noise. There should be none. If there is, you’ll
need to go through the adjusting process again.
You can now test your rear window defroster. With the hard top in place, turn
on the parking lights. The rear window defroster switch should light dimly.
If it does, turn on the ignition and press the switch. It should light brighter.
If it does, you can put the console back together.
Illustration 16 This completes the installation of the rear window defroster
switch.
Installing the Trim
Now that you know everything works and fits together nicely, it’s time
to finish the job by installing the trim items. Remove the hard top, one more
time, by loosening the two screws in front with the tool provided, release
the locking levers in the back, and have your helper assist you to carefully
lift the top off the car. Place it on that soft place again. Now slide the
two trim plates over those adjusting screws on the inside front of the hard
top. Install the two half-cup trim pieces over the latches using two screws
inserted from the bottom. The hard top is now ready.
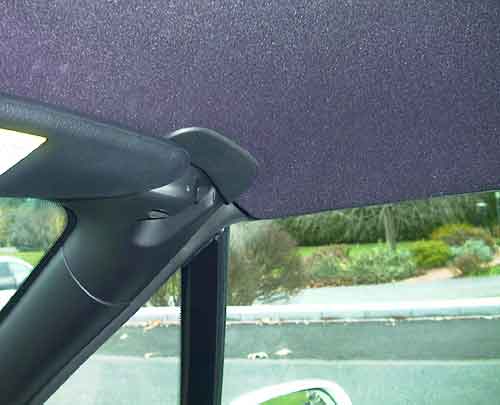
Illustration 18 Install the two support covers by slipping them into position
over the bolts that extend into that area from the doors and securing them
with the one screw inserted into the little well from the top. Insert the
cover caps, but rotate them to the open position to receive the pins from
the hard top.
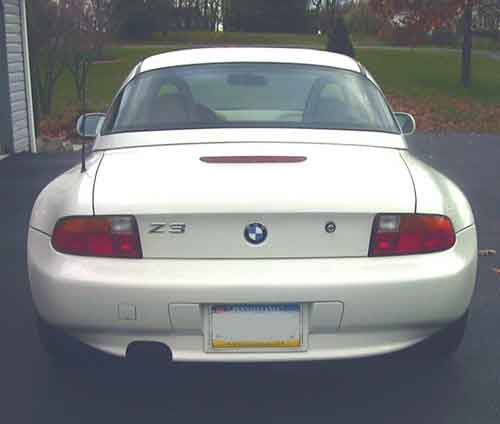
Now, put the hard top back in place. Secure the rear latches and tighten the
front retaining bolts using the tool provided. Congratulations. You now have
a Z3 coupe.
Having done the job once, I expect I could do it again in about 2 hours (for
one with the electro-hydraulic top). I guess it took me about twice that long
the first time. Doing one with the manual top would take longer because there's
more work involved in getting the wires to the switch for the rear window
defroster. It really does make the car nice for the winter -- secure, dry,
and quiet.
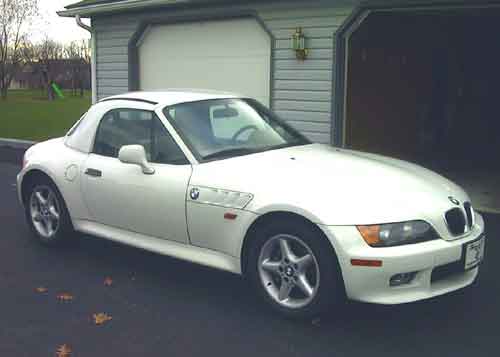
I am impressed with the fit of the hardtop. There are no wind noises around the windows or anything. And, I think it looks good, too.

 Esmerelda's Home Page~ Z3ers.com