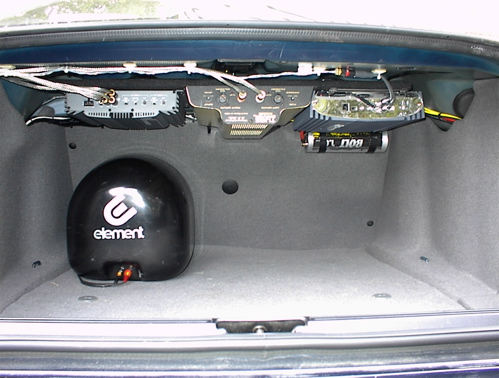
This is a picture of my trunk where you can see a 10” Audiomobile Subwoofer in an Element enclosure; a 4 channel Alpine amplifier (40 watts X 4) that drives the front Tweeters and the front midrange speakers; a 2 channel amplifier (75 watts X 2) that drives the front 5.25” mid bass speakers; a 500 watt class D amp that drives the sub; and a 1 mFarad stiffening capacitor for the subwoofer. The amps are attached to a fiberboard amp rack that is covered with black carpeting. The capacitor is attached to the rear seat back.
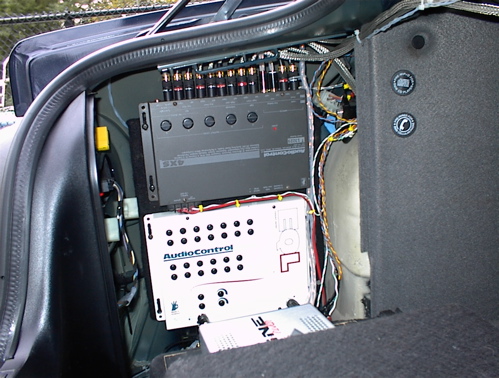
The RCA cable that is attached to the yellow connector at the TrafficPro is routed through the center console of the car, under the back seat and into the trunk compartment to the AudioControl 13 band Equalizer (white unit on bottom). The signal then goes to the AudioControl 4XS Electronic Crossover that sends the appropriate frequencies to the 3 amplifiers seen in photo #1. There are no passive crossovers used anywhere in this install.
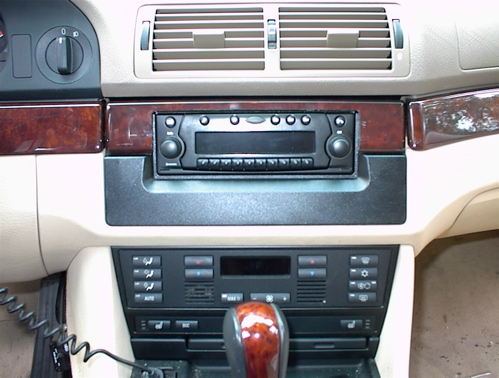
The completed TrafficPro install. I had to cut the stock wood grain trim panel to fit around the TP and attached it with Velcro. I hated cutting the panel, but it was the only way to make the install look right.
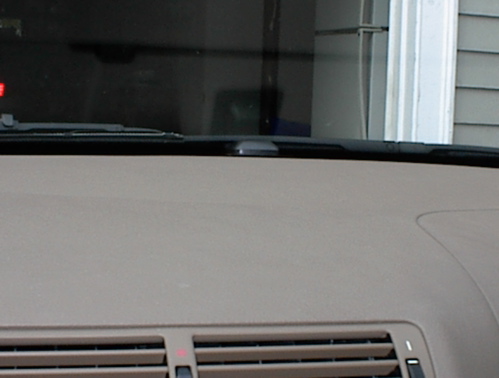
The GPS antenna mounted on the front dash. I couldn’t figure out how to remove the center air vents so I decided to mount it up high on the dash. It looks fine and I should get optimum reception from that location.
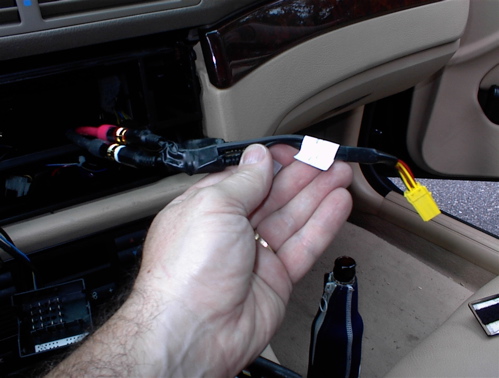
This is the optional yellow terminal provided by Becker that provides pre-amp outputs. You need this connector if you’ve installed or plan to install aftermarket amplifiers.
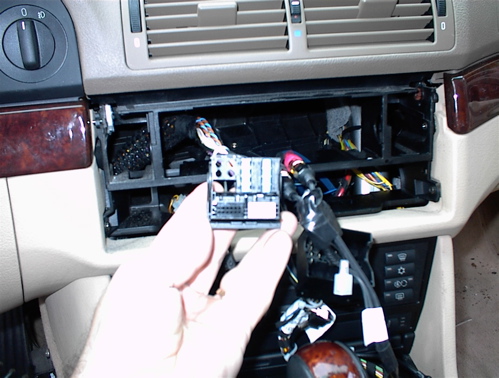
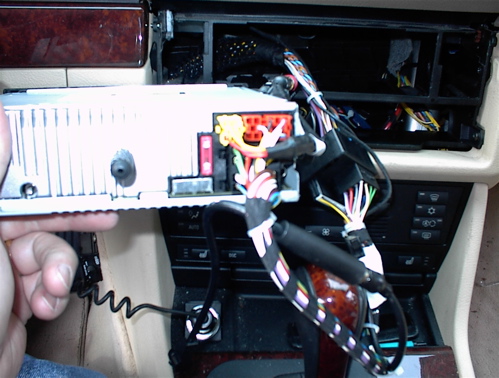
This is the stock connector that hooks up to the stock Business CD player. As you can see, it is very different from the connector found on the Z3 or the 3 series. Wiring harness BNA-139.631 is needed from Becker to interface with the 525i stock harness.
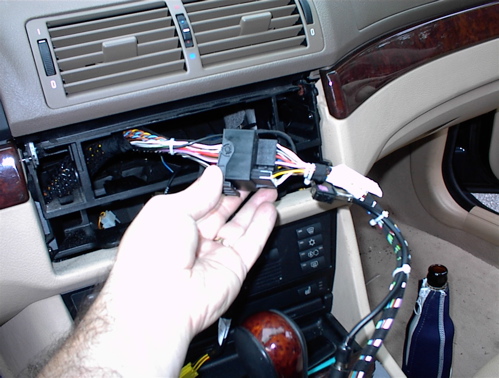
This is the TP wiring harness connected to the stock harness. Two FM antenna adapters are needed because the BMW uses a funky antenna connector that I’ve never seen before and the TP uses a VW/Audi connector. The first adapter takes the funky BMW connector to a universal connector and the second adapter takes the universal connector to the VW/Audi connector. It may be possible to find one adapter that goes directly from the BMW connector to the VW/Audi connector.
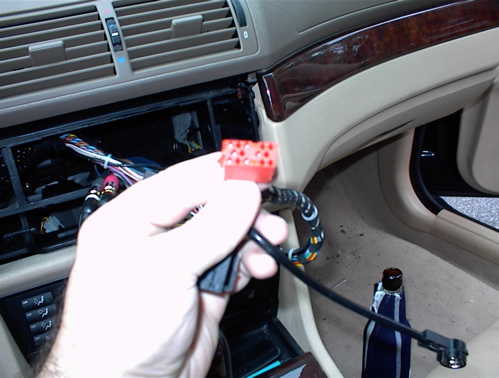
This is the red terminal from the Becker wiring harness that connects to the back of the TP. The red connector contains the steering wheel controls. They won’t work without the red connector attached. This is only a problem when you need pre-amp outputs (yellow connector) because the red and yellow terminals occupy the same space on the back of the TP and we all know that no two objects can occupy the same space at the same time! Not to worry, because a simple modification to the red connector is all that’s needed. Simply cut off the left 1/3 of the red connector (when looking at the back of the TP) using a dremel with a cut-off wheel. It’s OK to cut the red connector this way because only the right half of it has any wires connected to it. Look at photo #9 and see the yellow connector located to the left of the red connector.
This is the back of the TP with all of the connectors attached. Note the yellow connector situated in the space normally occupied by the left portion of the red connector.
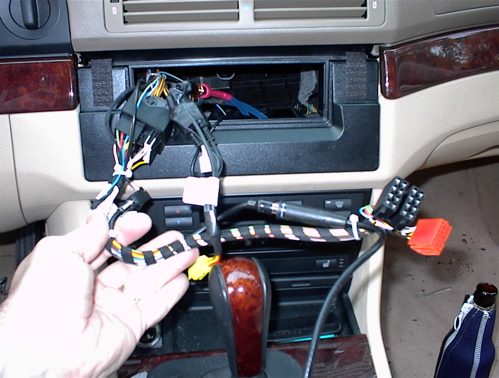
This is a photo of the completed wiring harness and you also get a good look at the face plate adapter that is available from Scosche (you can also see the Velcro in the upper corners of the adapter that attaches the wood grain trim panel). The Becker wiring harness is connected to the stock wiring harness; the two antenna adapters are connected; and the Preamp outputs (yellow connector) is visible. The speed sensing GAL wire is connected to the white terminal that is attached to the back of the instrument cluster. Removing the instrument cluster is fairly straight forward. Remove the two trim panels below the cluster (a friction fit, just pry them off). Remove screws on the underside of the top lip of the cluster and remove the screws where the trim panels have been removed and it’s off! Then follow the attached directions for interfacing the GAL wire. The TP is vastly superior to the stock Business CD and this is a recommended modification for those who are seeking sonic nirvana. Good luck fellow 5’ers! Al