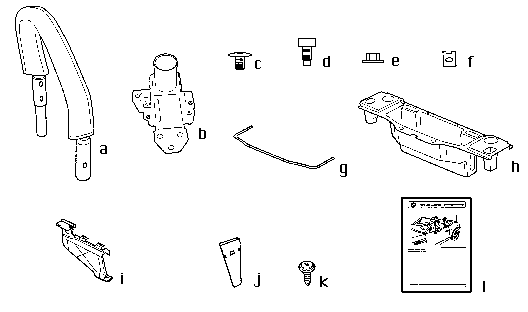
Required tools:
Parts kit:
|
|
1. Part-dismantle the centre console
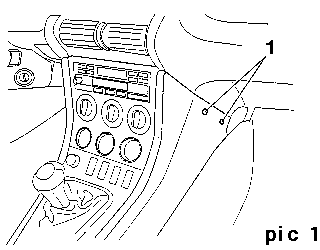 |
Prise out the covering caps (1) on both sides of the centre console using a flat tip screwdriver and undo the Phillips screws. |
 |
Fitting for smokers: Take out ashtray insert and undo Phillips screws (1). Then take out ashtray (2). Then undo Phillips screw which fixes the centre console.
Non-smoker version: Place seats and backrests in forward position. |
 |
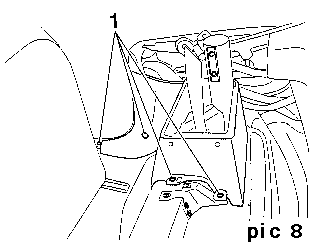
Next undo the Phillips screws (1) on both sides of the rear mounting of the centre console. |
2. Dismantle storage box
 |
Draw the centre console carefully upwards. Displace it and undo the Phillips screws (1) on both sides of the storage box. |
 |
Next undo the mounting of the storage box in the convertible top compartment. To do this, prise out the coverings (1) and undo the Phillips screws. |
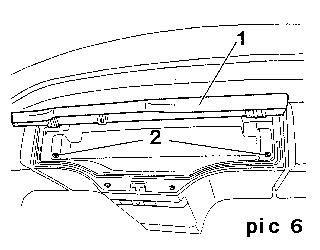 |
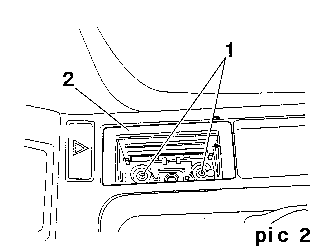
Open the cover (1) of the upper storage compartment and undo the 2 Phillips screws (2) shown in the illustration. The storage box can now be lifted out upwards. |
3. Dismantle side trim parts
| Before dismantling the side trim parts, screw off the seat belt on the seat. | |
 |
Prise out each of the three covering caps (1) and undo the
Phillips screws. Then remove the upper side trim panel (2)
and pull it through the seat belt. The upper side trim panel
(2) is no longer required.
Next unclip the sill strips in order to be able to remove the rear side trim panels. |
 |
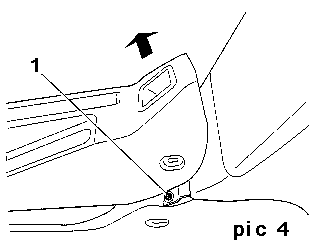
Undo each of the 4 Phillips screws (1) on the rear side trim panel and remove the side trim panel. |
| When removing the side trim panel fold the convertible top forwards a little. | |
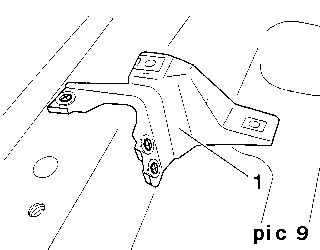 |
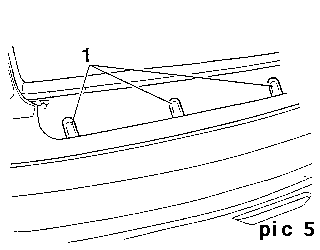
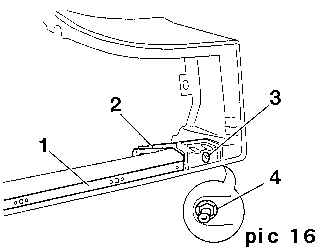
Unscrew each of the supports for the storage box (1). The supports of the storage box are no longer required. |
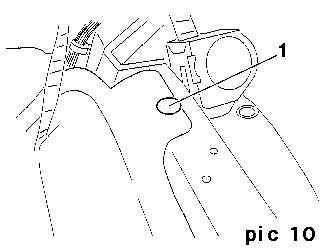 |
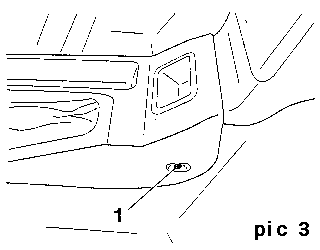
Undo the clips (1) on the rear floor covering. |
4. Fit consoles
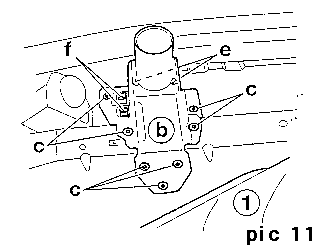 |
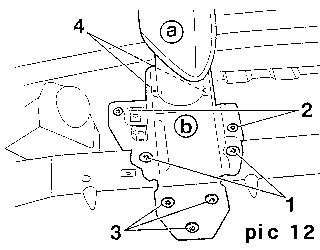
Fold the rear floor covering (1) forwards and place each of the consoles (b) in position. Screw in the TORX screws (c) and locking tooth nuts (e) for attachment of the consoles only lightly so that the consoles can still move. Place the speed nuts (f) in the recesses on the console. |
 |
Before screwing the console (b) down finally, insert
the rollbars (a) in order to be able to position the
consoles exactly in accordance with the rollbars. Next
tighten the TORX screws (c) and locking tooth
nuts (e) in the sequence 1-4. When the console has been screwed down the rollbar must still be able to be inserted easily into the two supports. The tightening torque of the TORX screws is 18.0 Nm; the tightening torque of the locking tooth nuts is 5.5 Nm. Remove the rollbars again and clip the rear floor covering on. |
5. Convert storage box
| The metal strip, the screws, and tenax fasteners are fitted again when the conversion is made. | |
5.1 Removal of the cover |
Prise out the small trimplate (1) on the storage box and undo the Phillips screws underneath. Remove the cover (2). Then clip the trimplates (1) on again. |
 |
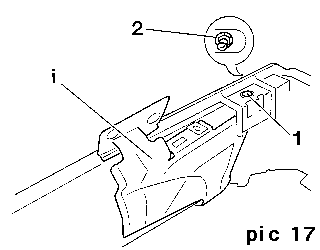
Undo the Phillips screws (1) attaching the hinge to the cover. The Phillips screws are required later for fitting the new cover. The cover is no longer required. |
5.2 Change of storage compartment |
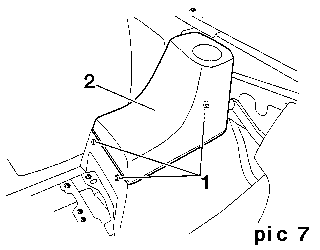
Undo Phillips screws (1) and remove storage compartment (2). The storage compartment (2) is no longer required. |
 |
Remove metal strip (12). In addition undo Phillips screw (3) and the tenax fastener (4). The support for the hinge (2) is no longer required. |
 |
Fit the hinge (i) in the storage box instead of the support for the hinge. Secure each hinge with Phillips screw (1) and tenax fastener (2). |
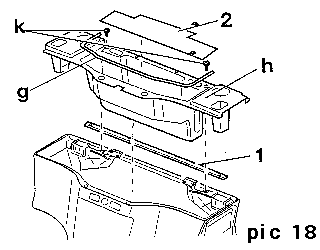 |
Place the metal strip (1) on the storage box. If necessary
glue the insert (2) and the seal (g) into the
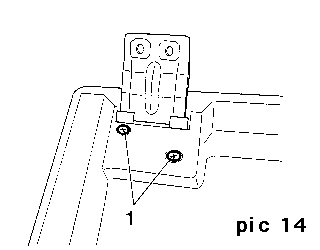
storage compartment (h). Insert the storage compartment (h) in the storage box and secure it with the existing Phillips screws and with the 2 additionally supplied Phillips screws (k). Next screw the new cover for the stoage compartment to the hinges. |
| To fasten the cover to the hinges it is essential to use only the Phillips screws with which the previous cover was screwed to the hinges. (See illustration pic 14.) |
6. Fit rollover bar
| Fit the rear side trim panel and the sill strip in each case. | |
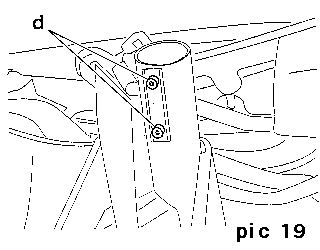 |
Before putting on the new upper side trim panels it is essential that the two TORX screws (d) for the seat belt deflection on the support tube are screwed in by 2 - 4 turns. Then fit the new upper side trim panels for rollbars. |
 |
Fit the converted storage box (1) in the vehicle and clip on the side covers (2). |
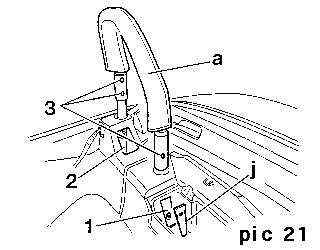 |
Insert the rollbar (a) in each case as shown in illustration
pic 21 and secure it in the following
sequence:
When tightening the TORX screws the rollbar must be pressed down so that no large gap forms between the rollbar and the trim parts and the attachment holes (3) do not become damaged. The tightening torque of the TORX screws is 18.0 Nm. Next lock the covers into place on the upper side trim panels and insert each of the covers (j) into the storage compartment. Then fit the seat belts and the centre console. |
7. Maintenance of the rollover protection system
| The TORX screws on the support tube and on the console which fix the rollbar must be retightened to the tightening torque of (18.0) Nm at the maintenance intervals Oil service, Inspection I, and Inspection II (see service booklet). | |
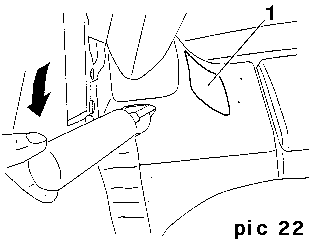 |
To retighten the TORX screws, the coverings in the storage compartment and on the upper side trim panels must be prised out. On the upper side trim panel, prise out the covering (1) with a screwdriver through the belt recess as shown in illustration pic 22. |