| Behind the Glovebox and Console
OK, now there is no way around it, the Kama Sutra of removing the glove box. The reason for this exercise is to hide all the wires you have just run, find a place to hide the UNGO cpu, Logic Sensor, hook up the other end of the Siren wire and whatever else you can possibly think of doing while the glove box is out. Hardwiring your V1, GPS cell phone power, stereo components, CB antennas ... 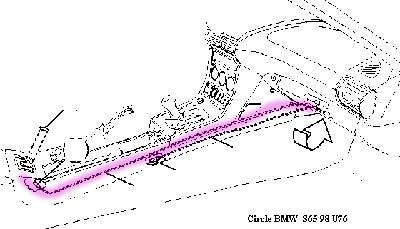 |
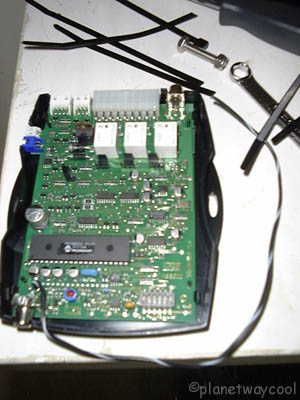
Open the UNGO cpu to adjust the jumpers according to your choice from the manual. Harvster had preset mine. We reset some of the options. Note the nut and bolt and wrench (from Z3 toolkit?). Trying to use that wrench in the awkward position in the engine compartment tightening the nylon threaded nut on the siren was not fun for Dave T. No way was I doing it! |
Update
March 5, 2001 Tom M writes: When you refer to disconnecting the battery you should mention disconnecting the negative wire first. Otherwise, if you put a wrench on the positive wire and it touches the metal chassis a short circuit will result. You can be burned by the arc it creates, or in the worst case the battery can actually explode! People have been blinded or even killed this way. Reconnecting goes in the opposite order, the positive first and then the negative. Safety glasses are a good idea on this part of the job. Uhm, I wish I knew that before we did it. I believe we just undid the positive. I am very happy we didn't blow up. 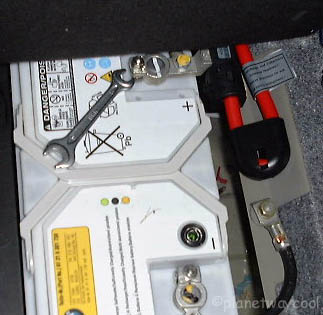 Note the wrench from the Z3 Tool Kit used to loosen the battery cable. You will also need something that doesn't carry current to keep the terminal from making contact with the battery while you work. Disconnect the battery before you remove the glovebox. |
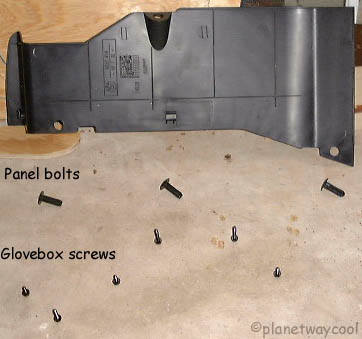
Remove black plastic panel behind bottom of glovebox. There are three plastic bolts. One in the front middle and two in the back corners. |
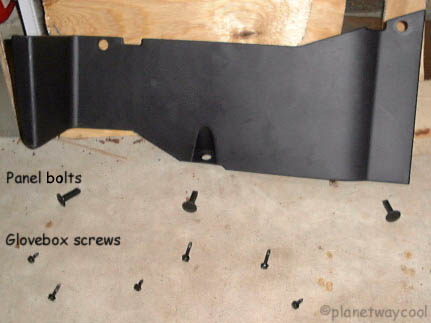
Turn the bolts 1/4 turn with the butter knife and remove. Pull off panel. Note where the panel fits into slots before you remove so you can replace the same way. And be sure to note the order of the different sizes and placement of glovebox screws! |
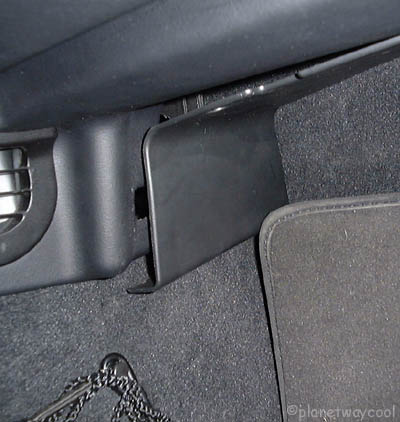
One of two holes where the second piece of the glovebox hooks on |
These are the same panels to replace for installing footlights. Must be a breeze! I'm trying to find out which wire to connect the footlights to so that they dim and light along with the dome light. update July 27 2001: which wire to use in dome light for footwell light install update June 13,2002 BobCz's Footwell Light Install |
| From digest.v7.n1443 Fri Apr 3 17:37:02
1998 From: Mike Frank Date: Fri, 03 Apr 1998 15:22:27 -0500 Another little tip. I would suggest removing any loose metal trim clips that the glovebox screws thread into and squeezing them with pliers so that they are really tight when you replace them over the holes. This way they won't shift when you are positioning the glovebox back in place. It is frustrating to replace the lower panel, the glovebox, the lights, and most of the screws, only to find a clip has shifted and you have to remove the glovebox again to reposition it (ask me how I know). Another reason to save the 7mm hex screw and the vent screws for last. 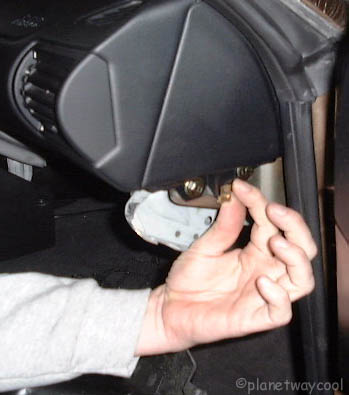
One of those precious little brackets that can come loose and cause rattles |
Be careful not to scratch the dash.

It takes a few mixings to match the color exactly, but once you do, you can repair scratches so you can't tell. Even matches surface grains.  I agree with Wizzard when he explains: These little buggers will cause more damage to the surrounding trim if you try to save them. Just protect the surrounding trim and destroy the caps when taking them off (needle nosed pliers worked well). Then, simply order a new set of 6 from your dealer. (Tan: 51-16-8-398-920, Black: 51-16-1-949-793) |
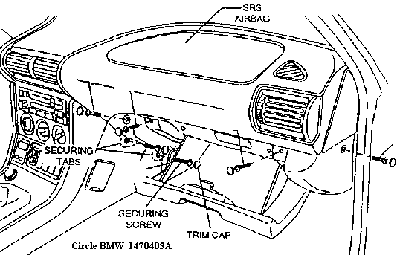
| There
are six screws holding on the glovebox. All six are capped with plastic
trim caps. Open the glovebox. There are two sets of two screws on either
side of the latch. We want the top two. There is one screw to the left
of the door. Look down in the passenger footwell. There are two screws
holding the console flap to the glovebox. Open the passenger door. There
is one screw on the side of the glovebox. Remove trim caps. Practice with
the ones behind the glovebox door. Place a piece of masking tape below
the cap. Insert the tip of the butter knife behind the cap. Bend the knife
down on the tape until the cap snaps off. Have a shoe box in front to
catch the cap. Repeat for all six caps. If you destroy a cap, you can
buy them for $.30 each. The write ups- on Circle BMW's site, under "Alarm Systems" and on It turned out all my screws were in the wrong order. I realized that must have happened at the stereo shop when they installed my afetrmarket head unit :(. Now I see how easy all this is, I never want these people taking my car apart again. I can take better care of my car. We put mine in right when were were done. |
Circle BMW Glovebox Removal (Alarm Systems link) |

(Removing Glovebox Rattles) |
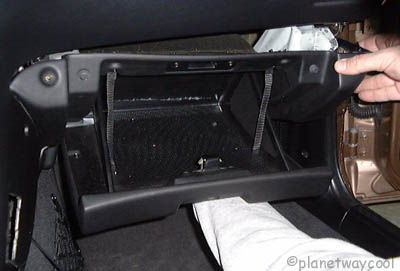
Dave T's glovebox coming out Pull the console flap out and maneuver the left side of the glovebox free of the console by rotating clockwise. Be carefull not to scratch or break the left hand part of the glovebox. |
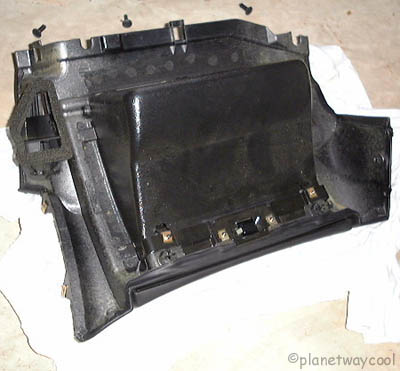
Dave T's glovebox face down on a towel |
|
(You want to try everything out and Set Levels before you put the glove box back in. Rememebr to reconnect the battery!) Replacement is the reverse. Pull out on flap and maneuver the left side of the glovebox in by rotating. Position the box and push hard on the right side to force the box in. Repace and tighten screws beginning with the ones next to the door latch. Replace trim panel and trim caps. |
| 5 Book Of UNGO Part 1 Plan Ahead~~ Part 2 So begins the search for parts~~ Part 3 Siren Placement~~ Part 4 Placing the LED, Cutoff Switch and Space Shield ~~ Part 5 Glovebox Kama Sutra~~ Part 6 UNGO CPU and Logic Sensor ~~ Part 7 Hardwiring~~ Part 8 Routing the V1 Power, Above and Below~~ Part 9 Setting Levels~~ Additional Information: Removing Console, Bumper Siren, UNGO Z3 Schematic, Wire Harness Basic System Diagram, Ziggy's UNGO Install |
 Esmerelda's Home Page
all rights reserved |